The: RadioLynx Wireless Start: unit is extremely popular with Lynx timers. While most won’t have issues, the goal of this post is to provide a quick way to troubleshoot the hardware if something does seem wrong. : If your software settings are configured correctly, you can troubleshoot why your RadioLynx: may be malfunctioning using just: an unfolded paper clip. Follow along with the steps below to help pinpoint what exactly is going on with your system.
Step 1:
With your FinishLynx system set up and turned on, remove the black and green plugs from the RadioLynx transmitter. Push the signal button in the top left corner to elicit a start.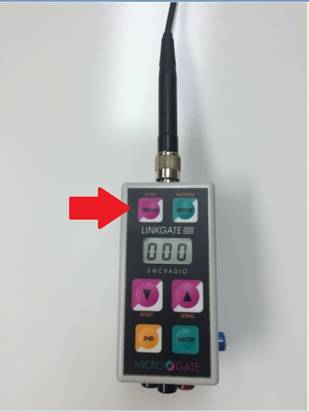
If no start is received, review your software settings and check internal dip-switches.
If a start is received, proceed to Step 2.
Step 2
Insert an unfolded paperclip into the black and green plugs of the transmitter and squeeze to elicit a start.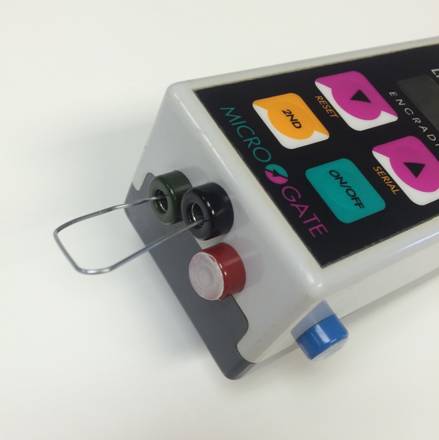
If no start is received, contact technical support.
If a start is received, the transmitter is working. Proceed to Step 3.
Step 3
Replace the cord by plugging in the black and green banana plugs. 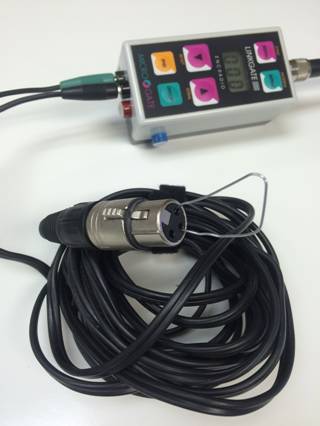 Remove the impact sensor. Insert the paperclip into the female XLR end numbered 1 and 3. Squeeze to elicit a start signal.
If no start is received, contact technical support.
If a start is received, the transmitter and cord are working. Proceed to Step 4.
Step 4
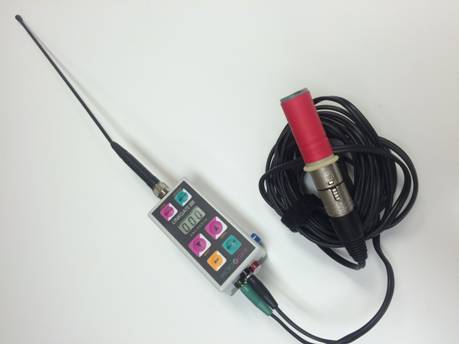
Replace the impact sensor. Blow into the sensor or tap into the palm of your hand.
If no start is received, the impact sensor should be swapped out with another or replaced.
 If a start is received, all of your settings and hardware are working properly.