The remote positioner for Lynx photo-finish cameras is a popular add-on that allows for the remote adjustment of cameras from within the FinishLynx software. The remote positioner contains small motors that enable the camera to tilt, swivel, or pan while mounted atop a tripod. In some cases—especially during tight storage—a motor can be broken and will require repair. If you have a broken positioner motor, Lynx will send you the replacement and you can complete the repair at your own convenience. Rather than sending your positioner back to Lynx, you can save time and money by replacing the motor(s) yourself. The process is very straightforward. After receiving your replacement motors, please follow the steps below.
To begin, find yourself a work area that is flat, clutter-free, and well-lit.
Necessary Tools:
- 1/4″ socket driver
- 3/16″ socket driver
- Medium Phillips head screwdriver
Note: Some older Positioners will require a 5/16″ socket driver as larger nuts were previously used.
If you’re only replacing the Pan Motor, skip steps 5-6, 8.
Step 1: Turn the Positioner so the back legs are closest to you. 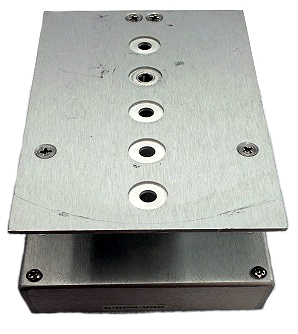
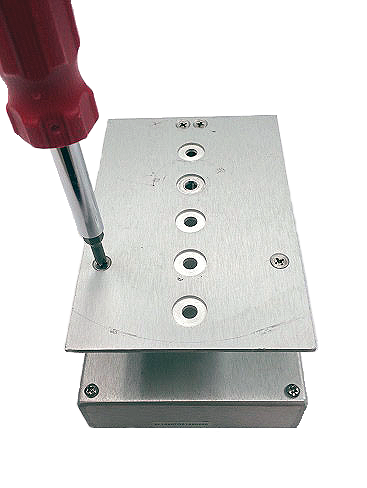
Step 2: Begin by removing the 2 short screws from the back legs of the mounting plate.
Step 3: Remove the 4 screws from the base of the Positioner.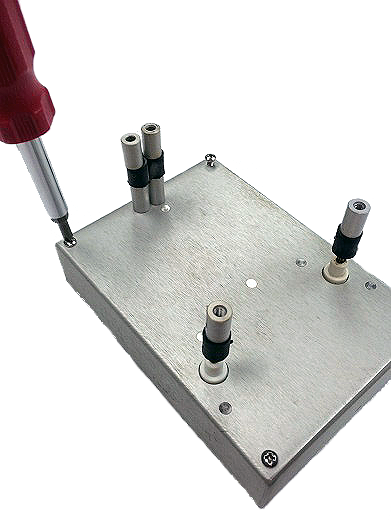
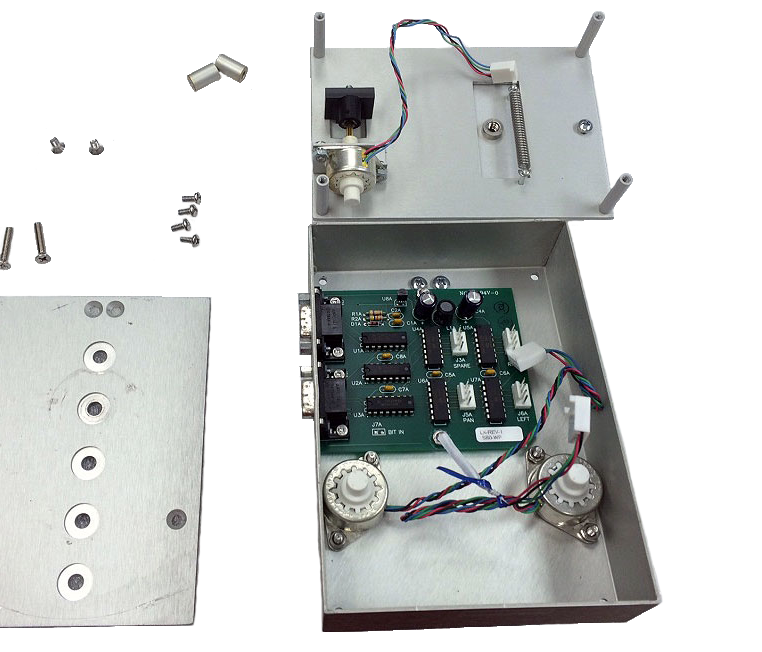
Step 4: Flip the Positioner over and remove the bottom plate. Unplug the 3 cables.
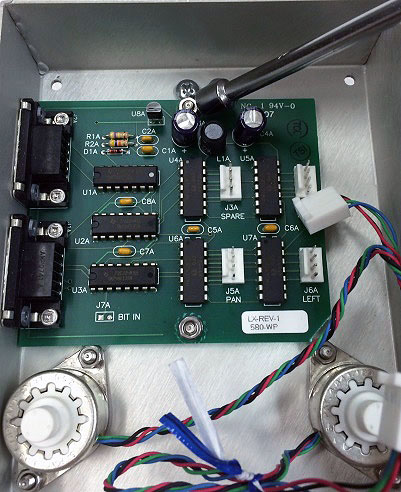
Step 5: Using the 3/16″ socket driver, remove the 4 jack screws from the sides of the serial plugs.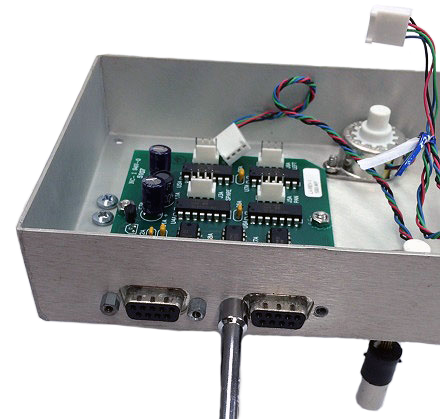
Step 6: Using the 1/4″ socket, remove the 2 nuts from the circuit board; remove the board by pulling up and away.
Step 7: Remove the nuts and washers from any broken motors. Transfer the stand to the new motor.
- Replace the old motor with the new motor with the wires pointed inward.
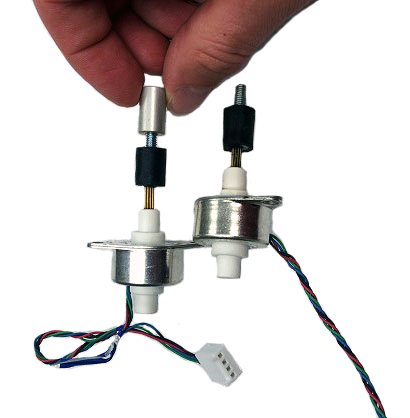
- Replace the washers and tighten the nuts.

Step 8: Replace the circuit board.
- Tighten the nuts. (The motor mount nut may need to be adjusted for the board to fit.)
- Tighten the jack screws. (Over-tightening may cause the screws to break.)
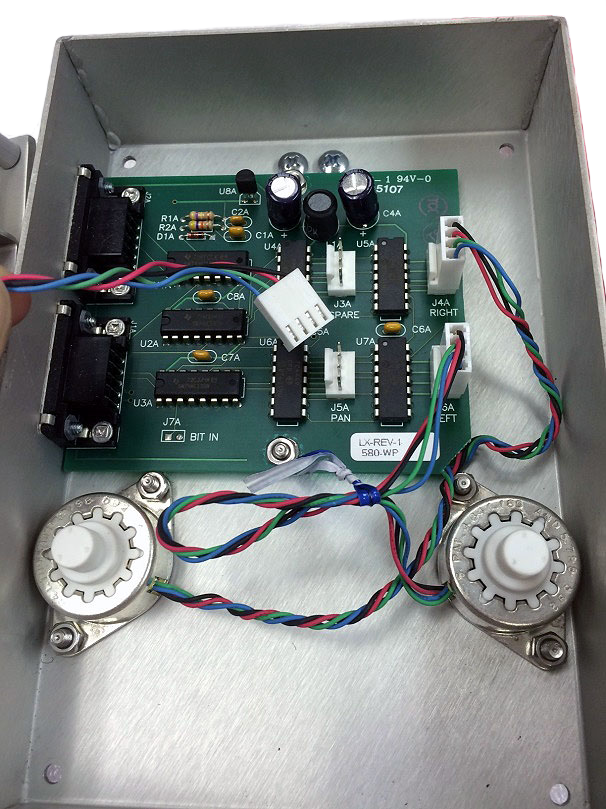
Step 9: Plug the motors into the board taking note of the labels and motor positions — right, left, pan
Also keep in mind that the motors are upside down and therefore reversed.
Step 10: Replace the bottom plate with the pan motor to the back.
Step 11: Flip the Positioner over and tighten the 4 screws on the base.
- Tighten the two long screws on the front legs of the mounting plate.
- Tighten the two short screws on the back legs of the mounting plate.
If you need any additional help, please contact tech support: 978-556-9780 or support@finishlynx.com
